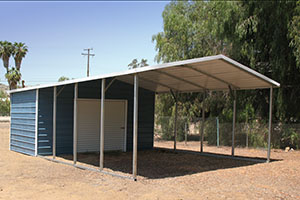
Before the installation team arrives, it's crucial to ensure that your site meets specific requirements to avoid delays and additional fees. The area must be level and free from any debris, obstructions, or hazards. Additionally, a clearance of at least 2 to 3 feet is required around the site to provide the crew sufficient space to work. Failure to prepare the site appropriately could result in the rescheduling of your installation to a later date, accompanied by an extra fee for the return trip.
To ensure a streamlined and hassle-free installation, it's crucial to prepare your site in advance. Below is a detailed checklist to guide you through each step of the preparation process: 1. Site Clearance Debris Removal: Ensure the site is clear of any debris. Additional Fee: A labor charge will be incurred if the installation crew has to perform this task. 2. Leveling the Site Check for Level Ground: A level site is vital, especially for certified buildings. Frame Adjustment: The frame can be adjusted up to 3" front-to-back without cutting. Cutting Fee: If frame cutting is required, an additional fee will apply. Optional Crew Leveling: If the crew has availability, they can level the site upon request. Warranty Caveat: Installation on an unlevel surface will void all warranties. 3. Foundation Preparation Concrete Foundation: A solid concrete foundation is strongly recommended. Surface Quality: Minor imperfections in the concrete are acceptable. Preparation Time: Ensure the concrete is poured and cured well in advance. Dimension Guidance: For a 12' x 21' carport, the foundation should measure at least 12’ 6” x 20’ 6”. 4. Access to Site Crew Accessibility: Ensure easy access for the installation crew to the site. Extra Labor Charge: Carrying materials over an unreasonable distance will result in an additional labor fee. 5. Safety Measures and Hazards Hazard Removal or Flagging: All potential hazards must either be removed or clearly marked. Overhead Electrical Lines: Maintain a 10' clearance from any overhead electrical lines. Underground Utilities: Mark locations of electrical, water, gas lines, as well as septic and sprinkler systems. Clearance Zone: A 2' to 3' clearance is required around the work area for crew safety. By following each of these steps, you'll not only expedite the installation process but also avoid any additional fees or complications. Thank you for your cooperation!
To ensure a smooth and successful installation of your structure, we've outlined key details and procedures to prepare for your big day. Please review this guide to know what to expect before, during, and after the installation. Pre-Delivery Confirmation Schedule Call: About a week prior to your scheduled installation, you'll receive a call to confirm that your site is ready. Time Window: During this call, we'll finalize a 4-hour window for the start of the installation. Installation Day Timings Morning Starts: Our crews generally begin installations in the early morning, with arrivals possible as early as 6:30 a.m. Safety Constraints: For safety, we limit installations to daylight hours and will not proceed in hazardous conditions. Delivery and Installation Requirements Signature Needed: A person over the age of 18 must be present to sign for the delivery and installation. Authorized Representative: If you cannot be there, the person present must have your explicit permission to sign on your behalf. Completion and Payment Satisfaction and Signature: Once you're pleased with the installation, we'll ask for your signature to finalize the job. Final Payment: Any remaining balance must be paid at this time. Unforeseen Delays Uncontrollable Circumstances: We are not liable for delays due to circumstances beyond our control, such as weather or road conditions. Rescheduling: If delays occur, we'll reach out to reschedule your installation as soon as mutually possible. Your understanding and cooperation are much appreciated as we aim to provide a seamless and efficient installation process. Thank you!